Saturday 6 April 2024

Simple Counter Using Javascript

Leave a Comment
HTML code
<div style='text-align:center;'>

<button class="btn decrease">Decrease</button>
<button class="btn reset">Reset</button>
<button class="btn increase">Increase</button>
</div>
<div id="counter" style='text-align:center;font-size:30px;'>
0
</div>
JS Code
let btns = document.querySelectorAll('.btn');
let counter = document.getElementById('counter');
let count = 0;

btns.forEach(function(btn){
btn.addEventListener('click', function(event){
 let target = event.target.classList;
 if(target.contains('decrease')){
 count--;
 } else if(target.contains('increase')){
 count++;
 } else {
 count = 0;
 }
 if(count < 0){
 counter.style.color = 'red';
 }
 if(count > 0){
 counter.style.color = 'green';
 }
 if(count == 0){
 counter.style.color = '#222';
 }
 counter.textContent = count;
});
});
Read More...

Get Any Possible Hex Color Code Using Array

Leave a Comment
HTML code
<button id="btn">

Click me
</button>
<span id="color" style="background-color: #fff"></span>
JS Code
let colors = ['0', '1', '2', '3', '4','5','6','7','8','9','A','B','C','D','E','F'];
let btn = document.getElementById('btn');
let colorCode = document.getElementById('color');

btn.addEventListener('click', function(){
let hex = '#';
for(let i = 0; i < 6; i++){
hex += colors[randomNumber()];
}
document.body.style.backgroundColor = hex;
colorCode.textContent = hex;
});

function randomNumber(){
 return Math.floor(Math.random()*colors.length);
}
Read More...

Get Random Colors Stored in Array

Leave a Comment
HTML code
<button id="btn">

Click me
</button>
JS Code
let colors = ['white', 'blue', 'red', 'green', 'orange'];

let btn = document.getElementById('btn');

btn.addEventListener('click', function(){
let randNum = randomNumber();
console.log(randNum);
document.body.style.backgroundColor=colors[randNum];
});

function randomNumber(){
return Math.floor(Math.random()*colors.length);
}
Read More...

Wednesday 7 October 2015

Adding Search Bar Beside Top Menu Using WordPress Plugin

Leave a Comment

On October 6th afternoon I got a gig offer from a South Korean (his username was fred82162, I will call him Fred in this article) about adding Google search bar beside top menu on his WordPress website. He gave me screenshots of his website indicating what must be changed and where it should be placed.

joxi_screenshot_1444120341554

The red rectangle in the above screenshot points to a search bar beside top menu bar. It must be replaced with Google search bar. Initially this looked like an easy task so I charged him very less. But during the work it came to my mind that I had to work hard to get this done. It felt like I should have charged more but then couldn’t do anything.

Fred said the search bar was just a normal WordPress search bar, to display it at top besides menu he used Search box on Navigation Menu plugin. Instead the plugin he wants to use is WP Google Search plugin. Fred said that “whatever customization you are doing should not change the design, only function has to change”. I said “agreed!!”

He gave me all the details required for the work to be done. His website is www.ikpca.com. Fred had already installed WP Google Search plugin on his website and is ready to be used. Navigating through his WordPress Dashboard I have seen that he is using Avada WordPress theme.
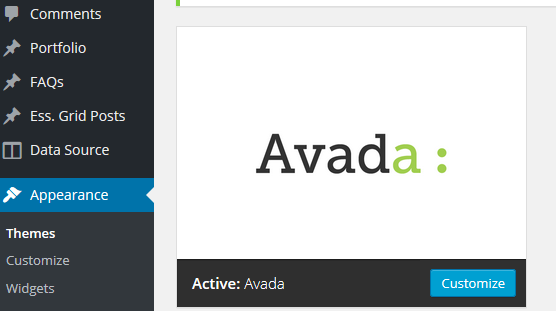
Avada-wordpress-theme

As I looked at header.php, it was clear that this code was very hard to understand. It was like full of custom theme framework. Initially I was looking at header.php for search box code. After some time searching here and there I found the searchform.php file. It gave me a big relief.

search-form

Fred told me that he used plugin to display search box at top. So I opened the Search box on Navigation menu plugin in editor. The code was very tiny for this plugin (see the code below).

add_filter('wp_nav_menu_items','add_search_box', 10, 2);
function add_search_box($items, $args) {

ob_start();
get_search_form();
$searchform = ob_get_contents();
ob_end_clean();

$items .= '<li>' . $searchform . '</li>';

return $items;

}

As I am familiar with WordPress plugin code I quickly understood what is going on in this code. Getting the contents of searchform.php and displaying it in list tags. So I thought why not display the Google search bar using the shortcode here itself. WP Google Search has shortcode for display purpose. Using the same Search box on Navigation menu plugin I displayed the Google search bar using the shortcode the plugin provided. The code looked like this.

add_filter('wp_nav_menu_items','add_search_box', 10, 2);
function add_search_box($items, $args) {
ob_start();
$items .='<li>' .do_shortcode('[wp_google_searchbox]'). '</li>';
echo $items;
$output = ob_get_clean();
return $output;
}

You can display shortcode using echo do_shortcode(‘[wp_google_searchbox]’); statement in WordPress. Echoing this statement in the plugin replaced all the menu items with Google search bar. It destroyed all the design. The shortcode value has to be returned in plugin to make it work normal. So I came across this page. On this page they were using somewhat similar code that I am seeing in this plugin editor. I changed it where ever needed and got a working code out of it. The code above displays the Google search bar right beside the top menu. I changed CSS styling codes and made it look like this finally.


google-search-bar


Google search bar that I placed works fine on this website. Fred was very happy to see this. He gave me 5 star rating and paid me.


fiverr-review


If you have any WordPress issue offer me a gig here on this page. I will let you know if I can do it or not.

Read More...

Thursday 6 August 2015

Avoid spaces being submitted in the script using jQuery

Leave a Comment

When we create any application using textfields it is possible that user may click on the submit button without entering any values in the textfield. We can restrict this easily simply by using if condition and double quotes like.

var name = $("#textfield").val();
if(name == ""){
alert("Please enter text in the text box");
}

But what if user presses spacebar a couple of times in the textfield and submits. This time the above code does not work. It will not alert the message instead it considers it as a value and executes the rest of the script. In this case we will get a null value submitted.


To stop user from entering null values ie spaces and submitting the form. We can trim the value first. That is we will remove the empty spaces. It can be done using jQuery trim statement.

var name = $("#textfield").val();
if($.trim(name) == ""){
alert("Please enter text in the text box");
}

Now the value gets trimmed and null values are avoided.

Read More...

Show remaining characters to be entered in textarea using jQuery

Leave a Comment

Some websites like Twitter limit number of characters that are typed in textarea. We can also see the remaining number of characters left for typing. This kind of feature can be easily implemented using jQuery.

Create a textarea  with id, cols, rows and maxlength attributes. In this example we will limit number of character to 25. Create a span with id. This span tag shows the number of characters remaining in textarea.

<textarea id="textarea" cols="20" rows="5" maxlength="25"></textarea>
Remaining Characters <span id="remain">25</span>

Now the jQuery part, here we should use .keyup event trigger in jQuery to capture every key release by the user in textarea. Create a new variable max, this is the maximum number of characters we can enter in the textarea. Now use if condition to check the characters entered in the textarea is less than or equal to 25 ie max variable. If condition is true, then subtract the number of characters in the textarea from max. Finally display that value in span tag. Thats it.

$("#textarea").keyup(function(){
var max = 25;
if($(this).val().length <= max)
var let = max - $(this).val().length;
$("#remain").text(let);
});

Lets see the full code

<textarea id="textarea" cols="20" rows="5" maxlength="25"></textarea>
Remaining Characters <span id="remain">25</span>

<script src="https://ajax.googleapis.com/ajax/libs/jquery/2.1.3/jquery.min.js"></script>
<script>
$("#textarea").keyup(function(){
var max = 25;
if($(this).val().length <= max)
var let = max - $(this).val().length;
$("#remain").text(let);
});
</script>
Read More...

Change the background color of webpage dynamically using jQuery

Leave a Comment

We can easily change the background color of webpage using post method in jQuery.

Create a input type=”color”, give its name and id. Add style tag and a div tag with id=”preview” to preview the CSS styles that we are using to change the background color.

Color:<input type="color" name="color" id="color">
<style></style>
<div id="preview"></div>

Now the jQuery part, write on change event trigger for the color input. Take the color value in a variable $color. Post the value to php script using post method in jQuery.


Next make sure the style tags does not contain any styles using .empty() in jQuery. Add the styles that we have got from the php script to style tag and also to div tag.

$('#color').on('change', function() { // fires only after clicking OK
var $color = $("#color").val();
$.post("color.php",{color:$color}, function(data){
//console.log(data);
$("style").empty();
$("style").text(data);
$("#preview").text(data);
});
});

Now the PHP script.

<?php
$color = $_POST['color'];

$code = <<<str
html{
background-color:$color;
}
str;
echo $code;
?>

In the PHP script we are capturing the posted color value in a variable $color. Next we are using heredoc in PHP to write the css styles and finally echo it.

Read More...
.